The Comprehensive Guide to Tile Installation Services: What to Anticipate
Tile installation is often both rewarding and complex. Homeowners often face decisions about materials and budgets, alongside the need for skilled professionals. It is essential to understand what to expect throughout this journey. Beginning with selecting the ideal tiles and extending to post-installation maintenance, numerous factors can affect the final result. What obstacles might surface, and how can they be effectively managed? Answers to these questions will shape the overall experience and satisfaction with the project.
Selecting the Best Tile Materials for Your Project
When commencing a tile installation project, homeowners often emphasize selecting the right tile products. The choosing process involves various factors, including strength, appearance, and installation requirements. Common materials include ceramic tile, porcelain, and natural stone, each offering distinct advantages and challenges.
Ceramic tiles are appreciated for their adaptability and affordability, making them well-suited for a wide range of rooms. Porcelain tiles, known for their strength and water resistance, are perfect for high-traffic areas and moist environments. Natural stone options, including marble and granite, delivers an elegant aesthetic but necessitates greater care and regular maintenance.
Homeowners should take into account the tile's pattern, size, and finish to achieve the desired visual effect. Ultimately, the correct selection of materials can improve the general appeal and usability of the room, making sure the installation satisfies both functional requirements and design preferences.
What to Expect During Your Tile Installation
When undergoing a tile get details installation, homeowners can prepare for a series of essential preparation steps preceding the installation day. Knowing what takes place on location, from the initial setup to the physical placement of tiles, is vital for a smooth process. This section presents these key expectations to help clients remain knowledgeable and ready.
Pre-Installation Setup Steps
Proper preparation is key for a successful tile installation, providing a smooth process and ideal results. It is recommended that homeowners begin by removing furniture and debris from the installation area, providing a clean workspace for installers. Next, evaluating the subfloor is vital; it must be level and free of damage to adequately hold the new tiles in place. Subfloor repairs that are needed should be finished prior to installation. Moreover, picking the correct tile style and pattern can impact both the appearance and performance, so homeowners should consult with professionals for advice. To conclude, reviewing the timeline and required supplies with the installation team will help align expectations and guarantee a seamless start to the project. Adequate preparation establishes the foundation for a smooth and effective installation.
What to Expect on Installation Day
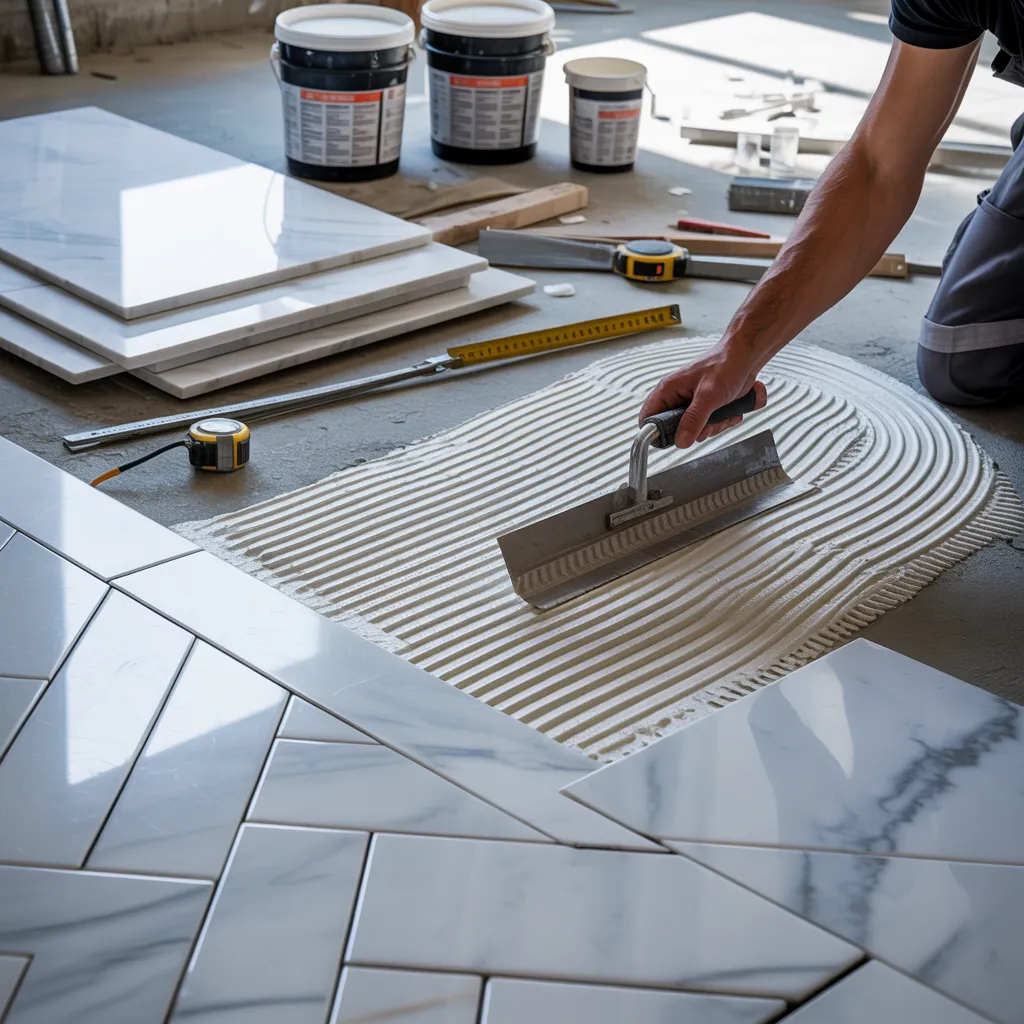
The installation day proceeds through a sequence of structured steps that ensure an effective tile laying outcome. The installation team typically arrives early, armed with all required tools and supplies. The team initiates by setting up the work area, confirming that it remains spotless and unobstructed. After this preparation, the installers will take precise measurements and mark the pattern, enabling accurate and exact tile positioning. As the tile laying process begins, they focus on maintaining even spacing and alignment, commonly employing tile spacers for greater accuracy. Depending on the size of the area, the work may require a number of hours to complete. After the work is done, the installers will clean the workspace and share instructions on grout curing time. Clients can look forward to expert craftsmanship and meticulous care during the whole installation.
How to Find and Hire the Top Tile Installation Experts
When seeking the most skilled tile installers, how can someone guarantee that the hired specialists demonstrate the needed expertise and trustworthiness? First, researching nearby contractors on the internet can offer valuable information. Ratings and reviews from former clients often reveal the quality of work and professionalism.
Next, obtaining several quotes provides comparison of services and pricing, supporting educated choices. It is important to verify that the professionals are certified and insured, as doing so guards against potential liabilities.
In addition, reviewing a portfolio of past projects can highlight the professional's expertise and aesthetic, verifying a match with unique expectations.
In conclusion, conducting interviews can help gauge professionalism and communication skills, vital for a productive working relationship. By adhering to these guidelines, homeowners can carefully choose skilled tile installation experts who meet their standards and expectations.
Typical Obstacles You May Encounter During Tile Installation
Throughout the tile installation process, a number of difficulties can occur that may impact the overall result. Problems with surface preparation can result in an uneven surface, while issues with tile alignment can lead to a visually unappealing finish. Tackling these issues is vital for achieving a professional-looking installation.
Surface Preparation Challenges
Thorough surface preparation is fundamental to achieving a successful tile installation, as it greatly influences the lifespan and visual quality of the finished product. Among the most significant obstacles regularly encountered is the occurrence of uneven substrate conditions. Variations can lead to tiles cracking or coming loose over time. Additionally, moisture issues can arise if the surface is not adequately dried or sealed, resulting in mold growth and damage. Debris, dust, or old adhesive can also inhibit proper bonding, compromising the integrity of the tile installation. At times, substandard leveling compounds may be utilized, leading to additional complications. Resolving these surface preparation challenges is essential for achieving a seamless and long-lasting tile installation, ultimately contributing to the overall satisfaction of the project.
Tile Alignment Concerns
Issues with surface preparation are often the cause of misaligned tiles, a widespread concern encountered throughout the installation process. Irregular subfloors or uneven wall surfaces may cause improperly aligned tiles, leading to visible gaps or lippage between neighboring tiles. Furthermore, insufficient gaps between individual tiles can further exacerbate alignment issues. When tiles fail to follow a consistent alignment, it can disrupt the aesthetic appeal and compromise the overall integrity of the installation. Poor adhesive application may also contribute to movement during the curing process, causing tiles to slip out of position. In order to address these concerns, meticulous surface preparation, accurate measurements, and consistent spacing are vital. Engaging professional tile installers can help guarantee that alignment remains precise throughout the installation process, resulting in a visually pleasing and durable finish.
Important Tips for Caring for Your Tiles After Installation
Caring for tiles after installation is crucial for safeguarding their look and lifespan. Routine cleaning is essential; employing a tile-specific pH-balanced cleaner aids in preventing damage. Steer clear of harsh chemicals that may deteriorate grout and tile surfaces. For routine care, a gentle broom or vacuum cleaner can clear away debris without causing scratches.
It is important to address spills right away to reduce the risk of stains, with particular attention to natural stone tiles. Moreover, applying a sealant to grout lines every one to two years offers protection from moisture and mildew.
It's advisable to use mats in high-traffic areas to limit surface deterioration. Periodic examination for cracks or loose tiles can stop more serious damage from developing. When necessary, expert deep cleaning services can restore the tile's original look.
What Is the Right Budget for Tile Installation?
How should homeowners approach budgeting for tile installation? Knowing the expenses associated with the project is key to precise budgeting. The full project cost commonly encompasses materials, labor, and supplementary fees including underlayment or the removal of existing flooring. Tile costs typically fall between $1 and $15 per square foot, varying according to type and quality. Labor costs usually add another $5 to $10 per square foot, influenced by the complexity of the installation.
Homeowners ought to factor in extra expenses, including tools, grout, and adhesive. It is recommended to set aside a contingency of ten to twenty percent for unforeseen issues or material overages. In addition, obtaining multiple quotes from contractors can offer better insight into the market rate. Overall, a thoroughly planned budget will assist homeowners in making sound decisions and eliminate unanticipated financial stress throughout the tile fitting process.
Common Questions and Answers
How Much Time Does Tile Installation Usually Take for a Standard Room?
Tile installation for a standard room generally needs one to three days, based on variables such as the size of the space, the type of tile, and the intricacy of the design. The time needed for prep work and drying can further lengthen the entire project.
Can Tiles Be Installed Over Existing Flooring?
Yes, tiles can be installed over existing flooring, given that the surface is properly cleaned, level, and structurally intact. That said, thorough evaluation and preparation are essential to ensure a durable and successful installation.
What Kind of Grout Should I Choose for My Tiles?
When it comes to tile installations, the available grout types are epoxy, sanded, and unsanded. Sanded grout works best with wider joints, unsanded is ideal for narrower spaces, and epoxy provides durability along with stain resistance, making it a great choice for high-moisture areas.
Is It Necessary to Seal My Tiles After They Are Installed?
Yes, it is generally recommended to seal tiles after installation. It boosts durability, reduces the risk of stains, and offers protection from moisture. The necessity of sealing may vary depending on tile type and location, so it is recommended to seek guidance from a professional.
What Are the Top Tools for DIY Tile Installation?
For DIY tile installation, key tools consist of a tile cutter, tiling trowel, level, tile spacers, grout float, and a rubber-headed mallet. Personal safety equipment like protective goggles and knee pads also guarantees a safer and more enjoyable working experience.